-
Blocksi Parent Resources
Glen Ellyn School District uses Blocksi to keep students safe on their school-issued devices. To help you monitor your child’s online activity, the Glen Ellyn School District has made available the free Blocksi Parent app. The Parent dashboard allows parents to enforce their own filtering policies when the Chromebook or Chrome client is outside of school. Parents can block specific sites, and view their child’s online analytics. With the Parent dashboard, you can:
-
Enforce stricter policies when the Chromebook is at home
-
Access time control at home for streaming, gaming, and social networking
-
Receive cyberbullying and self-harm detection alerts
-
View Web and YouTube history
-
Enforce bedtime and screen access time control
Account Creation
Parent Access accounts in Blocksi are rostered based on the guardian email address associated with Skyward Family Access. All parents/guardians in Skyward are provided with their own Blocksi Parent Access accounts.-
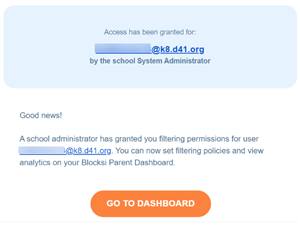
District 41 will send email to each parent/guardian email address that is listed in Skyward. Look for an email from Blocksi (no-reply@blocksi.net) with the subject line “Blocksi Parent Dashboard access granted”. You will click the button that says “Go to Dashboard”.
-
You will be prompted to Sign-in with Google. If you don’t have a Gmail account, click Register here and follow the prompts to set up a password and link the account to your child’s D41 email. (Make sure the student email address matches!)
-
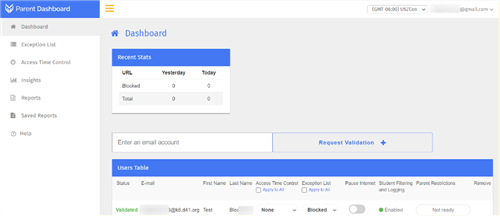
Once you are signed in, you will be redirected to the Blocksi Parent Dashboard.
Monitor Your Child
-
Blocksi Parent Desktop Guide
- Blocksi Parent Mobile App (Mobile Guides - English, Spanish, French, Portuguese)
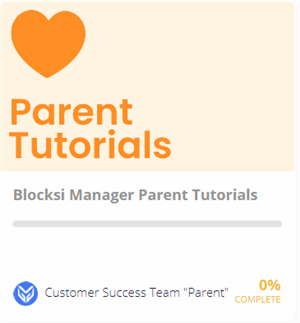
Blocksi Parent Academy (Video Tutorials)
- Sign Up and Register for the Parent Tutorials - Discount Code SPARK24
- Videos explaining both the parent desktop and app.
Logging In
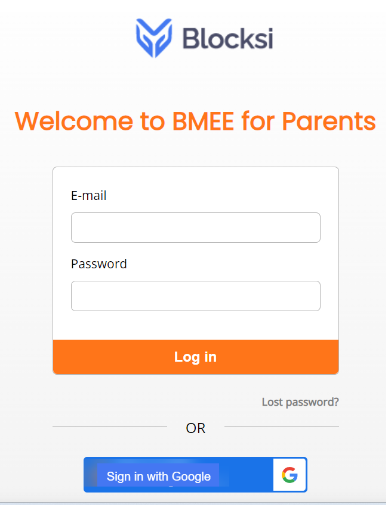
Log into the Blocksi Parent Dashboard at https://parent.blocksi.net/
Blocking Internet Sites
This is completed by creating Exception Lists and then adding sites to it.
-
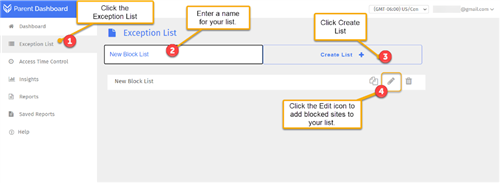
Click Exception List.
-
Enter a name for your list.
-
Click Create List.
-
Click the Edit icon to add blocked sites to your list.
-
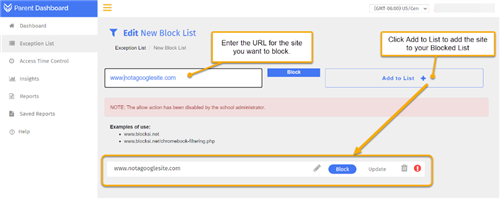
To add a site to the Blocked List, enter the URL of the site you want to block.
-
Click Add to List and the blocked site will be added to the list at the bottom of this page.
Restrict Access based on time of day
These controls allow you to restrict access to different services based on time of the day. This is completed by first creating an Access Time filter and then settings, the hours for each of the services within the list.
Create Access Time Filter
-
Click Access Time Control
-
Enter the name for the time filter
-
Click Create Access Time Control
-
Click the Edit icon to set the hours for access.

Set hours of Access for services
A note about the Bedtime setting. You can use the Bedtime setting to enforce bedtime by defining the days of the week and hours when your child can use their Chromebook. Days and times during which your child cannot use their Chromebook are blocked off in red and during these times the Chromebook is in lockdown browser mode, and your child is unable to use the device to visit websites. (Note: This control will not block other authorized educational applications open outside the browser, such as Scratch JR, Minecraft EDU, etc.)
-
Click the service you want to restrict
-
Click or drag select the grid boxes you want to select. Red is off.
-
Click Save Changes
The picture below shows Bedtime as from 10 PM to 6 AM Monday - Friday and 5 PM to 9 AM Saturday & Sunday, which restricts all use of the Chromebook browser during the red time.

Pause Internet
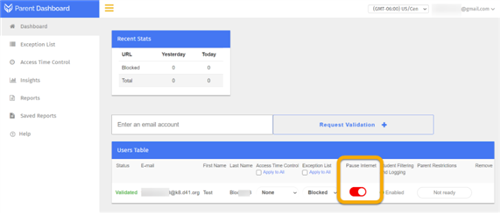
Click the Pause internet button to the right of the student; the button turns red indicating that internet access is turned off for the student. The student cannot access anything on the Chrome browser. (Note: This control will not block other authorized educational applications open outside the browser, such as Scratch JR, Minecraft EDU, etc.)
Apply Restrictions to Users
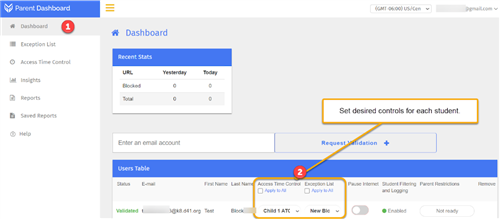
The last step is applying these controls to users. From the Users link, apply the desired Access Time Controls and Block LIst to the user by selecting from the drop down lists.
-
Click Dashboard
-
Click the drop-down for the Access Time Control and Exception List desired for each student.
Note: Clicking the Apply to all checkbox applies the same exception list you selected to all students in the USERS TABLE.
Reports
You can create Web Activity reports that generate daily, weekly, and monthly. These reports include the following information:
-
Report time
-
Allowed, blocked, and sites that required a warning for each organizational unit
-
Breakdown of each category, including most visited URLs
-
Most active users and the number of hits for each
-
Most blocked users and the number of hits for each
Generate Weekly Reports
-
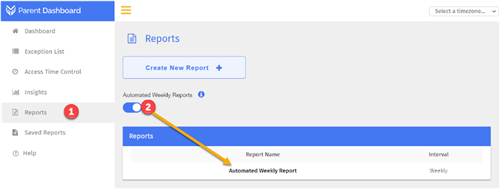
Click Reports
-
Turn on the Automated Weekly Report toggle button.
Generate Daily or Monthly Reports
-
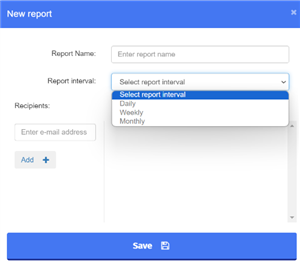
Click Create New Report + to create your own report. The New Report window opens.
-
Type the name of the report in the Report Name text box.
-
Select how often the report should run from the Report Interval drop-down list. The options are Daily, Weekly, and Monthly.
-
Type an individual’s email address to which to send a copy of the report in the Enter email address text box.
-
Click Add +. The email address appears to the right.
-
Click Save. The new report appears in the list along with the interval in the New Report window.
Reviewing Saved Reports
-
Sign in to the Blocksi Parent Dashboard using your Google credentials.
-
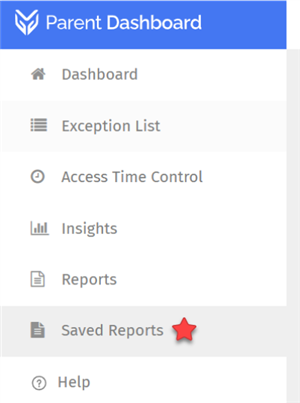
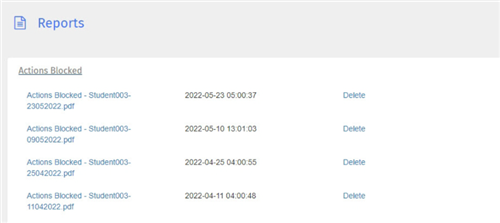
Click Saved Reports from the Main Menu. The Reports screen appears. All of the reports that have been generated and sent out by the system appear here.
-
Click the report name to view details about the report. Details include the date and time the report was run. A Delete link appears as well.
-
Click the report name to view the PDF. The PDF opens in a separate window. Click Sample Report to see an example of a report.
Addition Information
- Learn more about Blocksi Manager Education Everywhere.
- Blocksi Parent Dashboard Help Site
- Visit the Blocksi Parent Hub for more information and Parent Resources.
- Get additional help with the Blocksi Parent Mobile App here - English, Spanish, French, Portuguese.
-
Select a School...


